Post apocalyptification of toy cars is simple, fast and joyous.
Filed under: Miniatures, Workbench | Tagged: 2019, 20mm, Crazy Horses, Death Race, Gaslands, Mad Max, North Star Military Figures, Post Apocalyptic, Sci-fi, Wasteland | 38 Comments »
Post apocalyptification of toy cars is simple, fast and joyous.
Filed under: Miniatures, Workbench | Tagged: 2019, 20mm, Crazy Horses, Death Race, Gaslands, Mad Max, North Star Military Figures, Post Apocalyptic, Sci-fi, Wasteland | 38 Comments »
I have been painting a lot of terrain recently, largely ruined post-apocalyptic and science fiction items.
I have been enjoying the process more than usual, primarily because I have decided on a technique that rapidly gives me a rusted, industrial ruin effect that I like and with very little precision work required.
It uses spray cans, but not an airbrush.
If you are interested in the process, then take a look. Continue reading
Filed under: Terrain, Workbench | Tagged: 2019, Fort Hardknox, Post Apocalyptic, Sci-fi | 29 Comments »
I have been streamlining the post production elements of photographing my toy soldiers. Continue reading
Filed under: Editorial, Terrain, Workbench | Tagged: 2016, Kuripu Jima, Shonen Knives | 15 Comments »
I took WIP photos while painting one of the second batch of Sci-Fi Construction Crew models last week. I did that in order to illustrate how I went about the process in a subsequent blog post, this post in fact.
Filed under: Workbench | Tagged: 2000AD, 2015, ABC Warriors, Construction Crew, Sci-Fi Non-Combatants | 21 Comments »
Filed under: Editorial, Influences, Workbench | Tagged: 40K, 40K Skirmish, Eldar, Exodite, Foaks, Guardians of the Galaxy, Hasslefree, Ramshackle Games, Reaper Miniatures, Sci-fi | 15 Comments »
After a few weeks of making a large mess in the man-cave I finally have a 28mm space jungle. Continue reading
Filed under: Terrain, Workbench | Tagged: 2014, 40K, 40K Skirmish, Alien Flora & Fauna, Deathworld, Rogue Trader, Sci-fi | 18 Comments »
I attached magnets to the bases of my DreadBall miniatures. I also magnetised the bases on my Blood Bowl teams a while back. During play the ball (with corresponding magnet) can be quickly and easily placed on the players base, where it will stay during play. It makes a surprisingly fiddly aspect of the game easier. Those of you who have hardly given a thought to where you position your balls may be sceptical, but its worth the minimal effort. Continue reading
Filed under: Boardgame, Miniatures, Workbench | Tagged: 2013, Blood Bowl, DreadBall, Magnets, Sci-fi | 6 Comments »
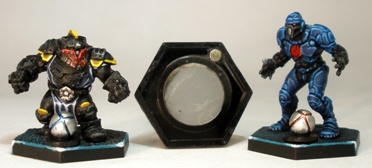
I am currently playtesting a Ganesha bug-hunt game called “Swatters”. Unlike the majority of Ganeshas games Swatters is squad rather than skirmish based. Squads and various terrain and objective elements in Swatters are defined by a “Cohesion Distance”, conveniently represented by an old compact disc.
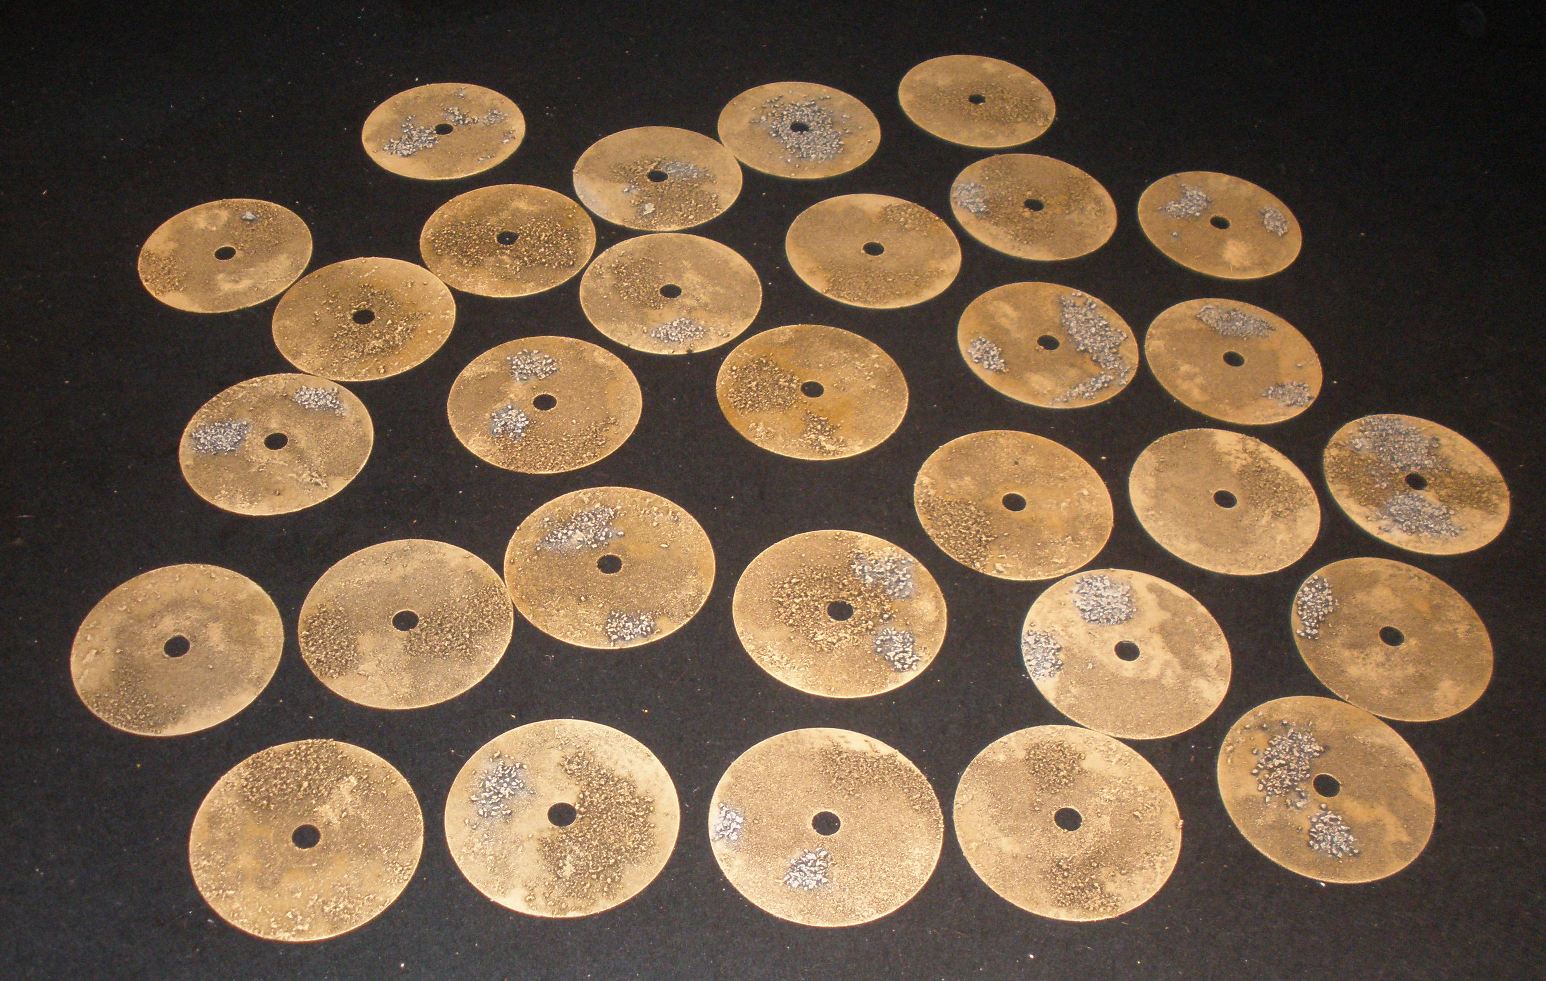
As can be seen by the ugliness of the shiny CDs used in the first days playtesting I needed to make a number of old CDs look a little less shiny and ugly and to try to match them to my Zuzzy mat gaming surface.
In excruciating detail, interspersed with reasons why I did the things that I did, this is how I did it.
Firstly I sanded the shiny side of thirty CDs with coarse sandpaper, to give the paint/glue something to grip to. I didnt bother taking photos of that stage.
I then mixed up a batch of black paint (I used black gesso as I had some around and gesso is designed to give additional tooth to paint anyway), ready mixed filler and PVA/white glue. This mix was then painted all over the sanded side of the discs. I then sprinkled two different kinds of flock and some granulated cork onto the wet paint/glue mix in patches. I then left the lot to dry overnight.
Keen eyed observers will have already noticed that I didnt cover up the holes in the CDs. I didnt bother for a number of reasons:
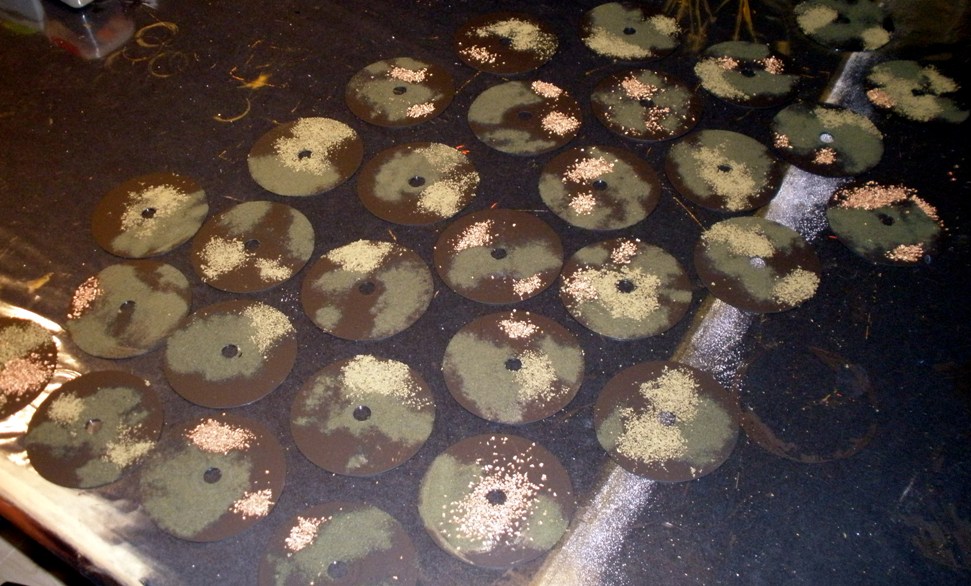
The following evening I thinned the paint/glue/filler mix that I had already made with water and applied it liberally to the flocked areas. This was in order to both colour the flock and to seal it so that it doesnt fall off when used.
At this time I also sprinkled another grade of flock kindly donated by COM onto the balder parts of the CDs. This flock was fine enough to absorb the paint/glue/filler mix as I applied it, so it didnt need to be sealed again afterwards.
Even though I usually base my figures with sand from a local beach, I wanted to use flock on these bases. The primary use for the bases is to work as movement trays for miniatures and as such miniatures are likely to fall over on them from time to time. I wanted to ensure that the textured bases were relatively soft and less likely to chip the miniatures than sand.
I used to have a gaming table covered in sand at one point and it regularly caused miniatures to chip. It also caused bleeding knuckles from picking up dice. Although the idea of a room full of nerds playing so hard that our fingers bled is kind of funny (and reminiscent of Bryan Adams lyrics), it was mainly a pain in the ass. So flock this time then.
I let the flocked and sealed CDs sitting on the table to dry overnight again.
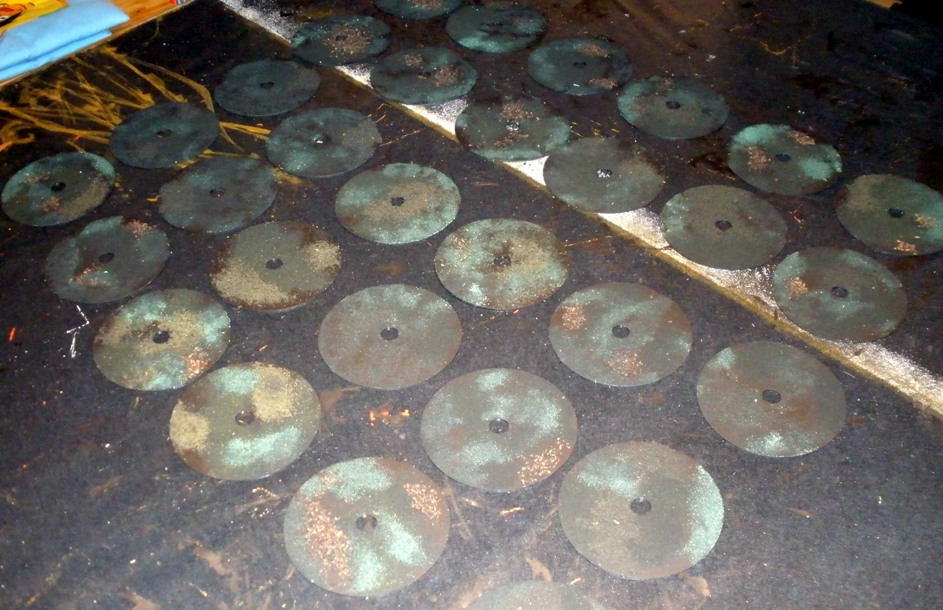
The first step the following evening was to break out the foam paint roller (visible top left above) and to roll the base paint colour that I use for my terrain bases and for my wasteland Zuzzy mat onto the CDs. It was important not to have too much paint on the roller at this point as it was an overbrush effect that leaves dark paint in the recesses that I was going for.
I considered adding some other colours in patches beneath (like how I approached painting the Zuzzy mat last year) before I got the roller out, but decided that at best it would be effort that wouldnt be seen (as the discs would be covered in miniatures during games) and that at worst it might actually make the neutrally coloured bases a bit gaudy and therefore potentially detract from miniatures put on them. So I didnt do that.
If gluing junk and fluff to CDs and painting them has a fun bit, then this stage is it. I was pleased to see how the broken ground effect that I was going for was working out and unifying the colour makes that sort of thing visible.
I then mixed some white into the colour and rolled that onto the discs, but using a lighter touch than the previous layer so that it would work as a highlight. Lastly I mixed a mid grey with black and white and added some of the base brown to it and brushed some of the rougher areas in that colour to make it look like scree or similar.
The finished CDs can be seen in the first picture in this post.
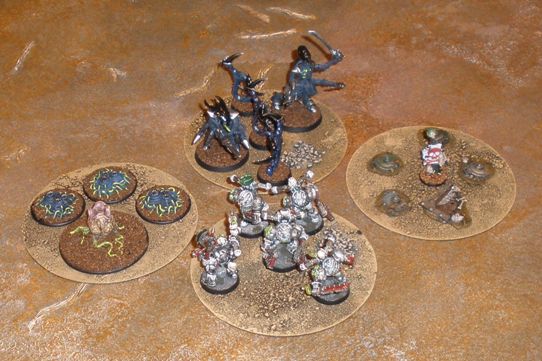
Many people use CDs as bases for terrain. CDs are pretty much impossible to warp and they are very cheap/free. Regardless, I was put off using CDs as bases until now because of their uniform, perfect circle footprints, which I find visually jarring.
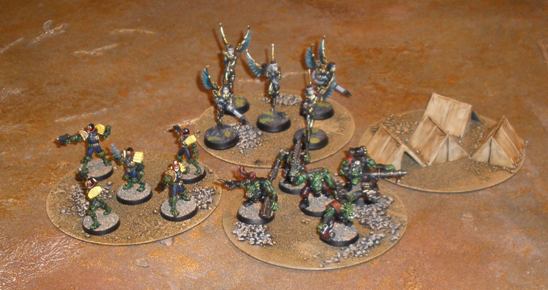
Despite my reservations I couldnt help but plonk down some various small terrain pieces on a few of my finished CD Swatters bases to see if they helped to delineate a minefield or campsite or whatever, which of course they did. So the CDs will likely have more uses than just as movement trays in games of Swatters.
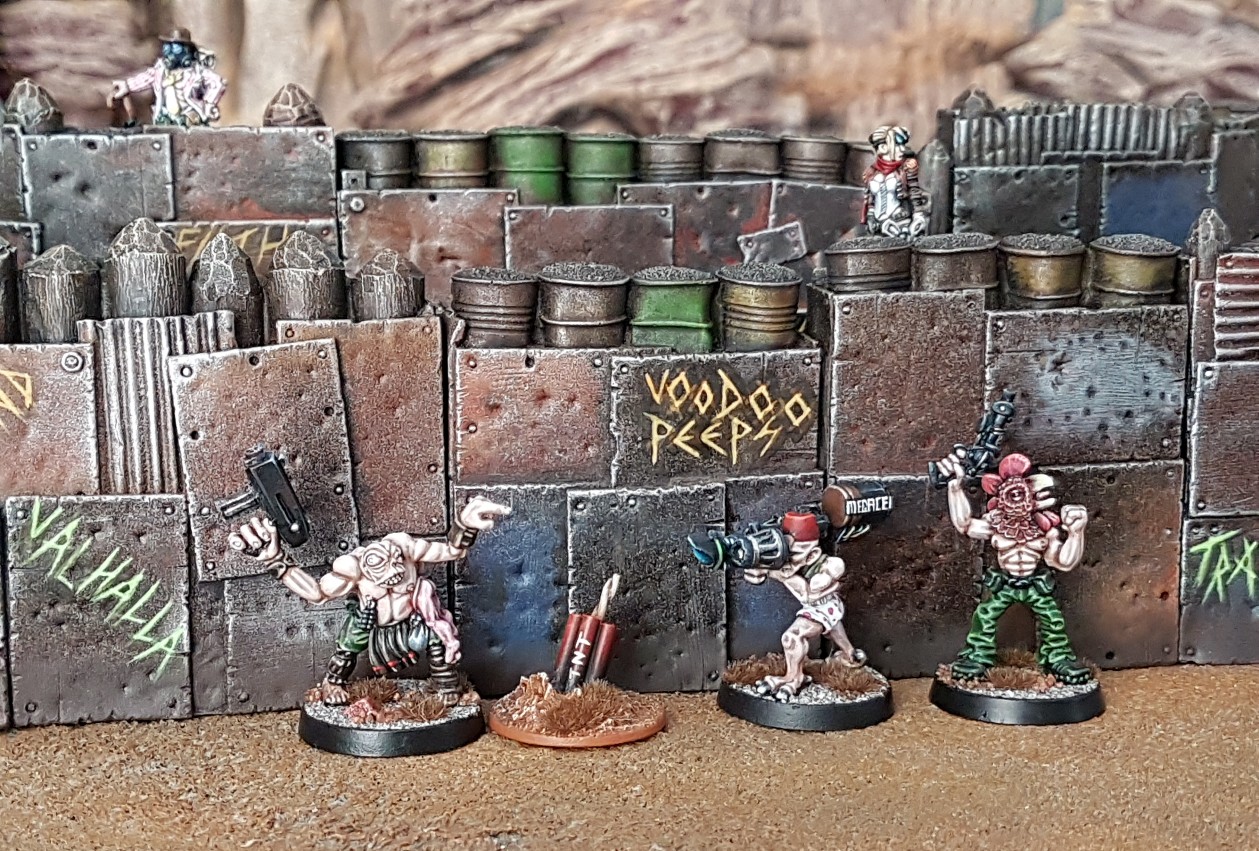
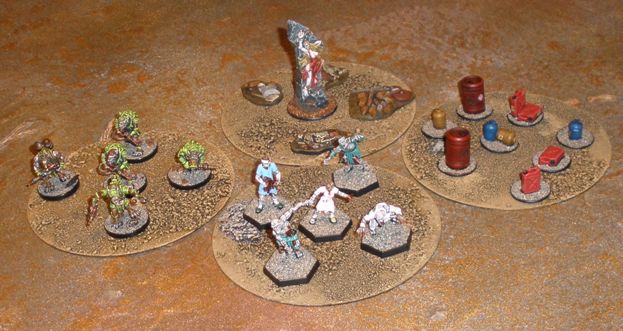
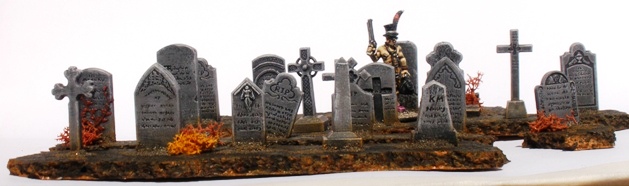
Clockwise from top: a human sacrifice, a load of things that can explode, some dead people who have escaped from hospital and a unit of ratmen from space, ratmaning it up.
Large terrain pieces that are lovingly modeled onto their bases/CDs are nice to look at but difficult to store and often hard to actually game with. Therefore I tend to make small terrain pieces that I clump together to represent a woods or a ruin or whatever.
This approach works adequately, although it is handier if the area represented by giant mushrooms/unexploded bombs/an interdimensional vortex is represented physically in some way. So thats another use for these thirty CDs.
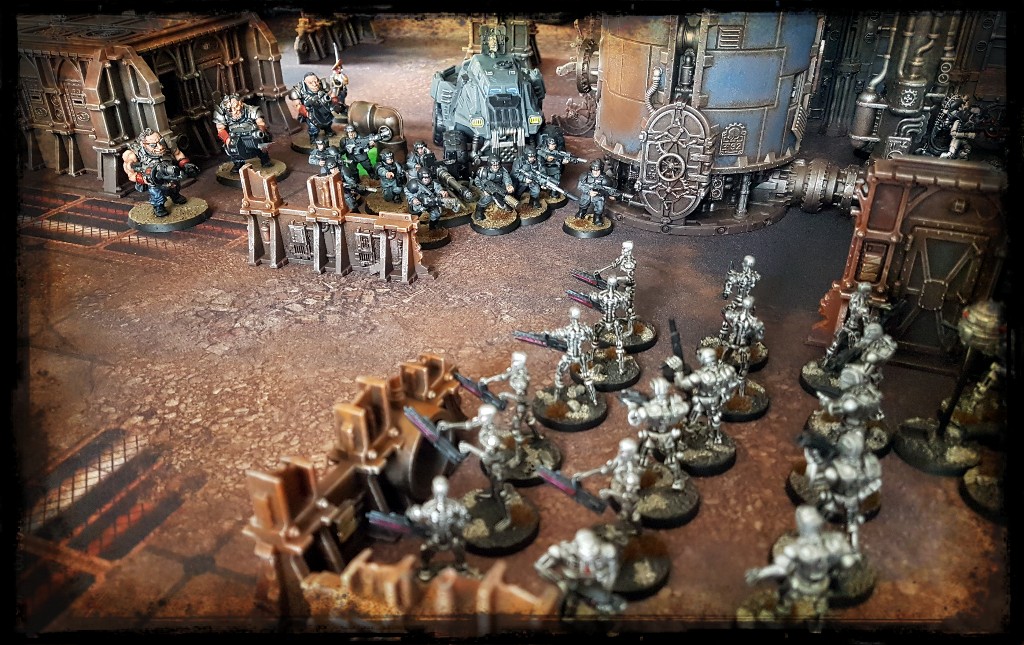
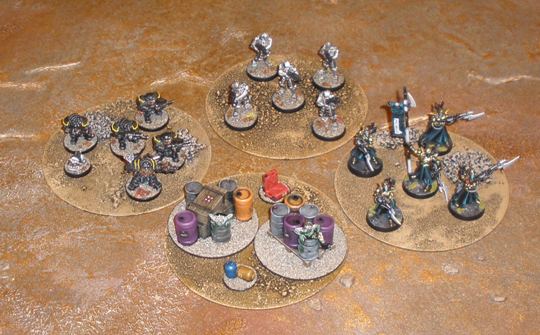
Clockwise from top: skeleton robots, Eldar Guardians, zombie spawn points conveniently located near butane cylinders and gas cans, squat space dwarf forgefathers.
The sand that I have used to base miniatures for a few years now is chosen to be neutral, so that it looks passable primarily on my urban and wastelands terrain sets. As you can see above the sand isnt a perfect match for the CDs or the mat, but its not very jarring either. Its an acceptable compromise, although its a bit extreme on large areas like the zombie spawn points above.
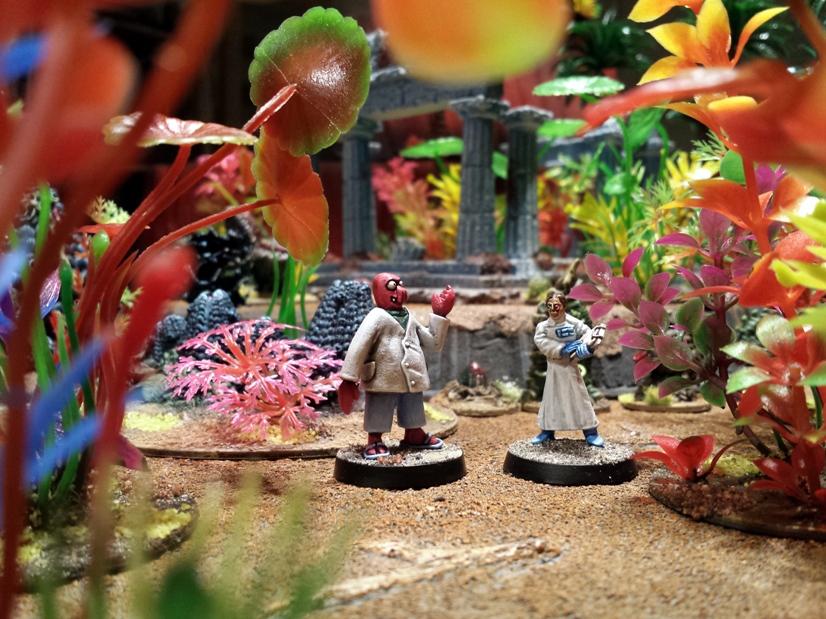
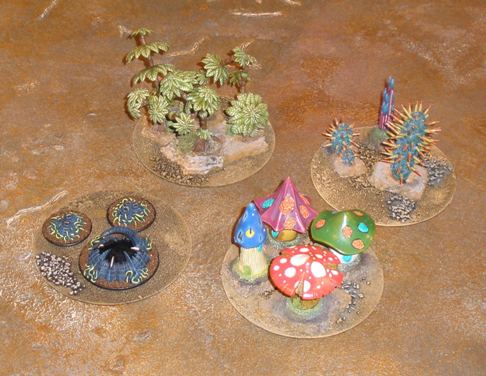
Clockwise from top: some jungle, some cacti, some fungus and an area that belches forth unspeakable horror.
A final issue that I have with terrain pieces regards storage. I am lucky enough to have quite a bit of space assigned to my hobby stuff, but I still need to make sure that the things that I make can be stored reasonably well. One of the reasons that I didnt cover up the holes in the CDs is so that they could be returned to the spindle that they were supplied on.
Very tidy. Unlike this meandering, huge blog post.
Filed under: Terrain, Workbench | Tagged: 2013, Swatters | 16 Comments »
I have wanted a graveyard terrain set to game with for many years, but I never got around to picking up the many expensive crypt, mausoleum, gravestone and perimeter pieces required.
Then Games Workshop released the Garden of Morr graveyard kit last year. It looked like a convenient and reasonably cost effective way to cover my toy soldier graveyard needs so I picked up a couple of sets last Autumn.
After some consideration I decided that I would prep the graveyard to fit with my wasteland terrain. The classic movie graveyard tends to be a bit greener than that and for a while I was tempted to go for that more Transylvanian look. I have a bit of an aversion to playing games on green, golf course like tables however and as I had already painted up some Renedra gravestones that I picked up at Salute last year to match the wasteland terrain, I went with that again here.
The Renedra gravestone kit is straightforward and very nice. The Garden of Morr is fantastic. It goes together very easily without need for clamps or rubber bands or anything fiddly. It also looks really nice when assembled, even before painting.
The painting process took me a few hours each day for about four days or so. I tend to be slow at things like this so its possible that some time could be shaved off that I reckon. Below are the steps that I used to prep the lot, which should give anyone interested an insight into how I approach projects like this, for better or for worse:
Parts were clipped from the frames, mould lines and the like were cleaned off and the loose gravestones were attached to cork tile bases.
Next all of the pieces were lightly sprayed with grey primer spray from above. I recently read somewhere that the kids call that “zenith highlighting”. Who knew? Cat provides cheerleading section.
All of the parts were then given a pretty heavy drybrush of white acrylic. Note the Deadwood DVDs that were running on the laptop while I worked, helping to keep me in a cowboy frame of mind.
Some areas were tinted with washes of ink and/or thinned paint. Detailing started in some areas. Another cat provides aesthetic critique. Note the DVD rental of Cowboys and Aliens which I had hoped would keep me in a Western frame of mind. It didnt. Dont watch it, its depressingly awful. If I believed in souls then “soulless” would be an apt description.
More detailing. The most significant progress here was on the mausoleum roofs, although various other elements were also layered up. This was usually done with a single tinted translucent colour so that the black through grey through white beneath showed through. Painting GW Tin Bitz on the railings was the most tedious part of the whole job.
I am not really a GW basher: I have had plenty of fun with their products over the years even if I dont tend to have a whole lot of interest these days. But there was a somewhat amusing element to this kit that I thought that I would mention.
GW products get a lot of stick about their propensity to stick skulls and skull motifs on any vaguely flat surface. A graveyard seems to me to be one of the few places where its possible to get away with that sort of thing, but the GW designers decided to go berserk with skulls on the Morr kit.
Out of (morbid) curiosity I counted the skulls and skull motifs on the set.
A Garden of Morr features:
I assembled two kits meaning that I quickly painted a staggering 718 skulls. Hilarious.
A few skulls here and there is fine with me as I am not going for a realistic looking, architectural style piece. The sort of graveyard that featured in Buffy or Scooby Doo is what I was looking for. Even so, that really a lot of skulls.
If the vast amounts of head bone on the kit dont bother you then I thoroughly recommend it, its very practical in game terms and it assembles very quickly and easily. I would not recommend buying the kit with the intention of removing most of the skulls and skull motifs as it would be a huge pain in the arse. I am sure that some people would do it, but it would feel like a waste of time to me.
Photos of the finished elements of St Craniums Cemetery will be posted up on Wednesday.
Filed under: Terrain, Workbench | Tagged: 2012, Malifaux, St Craniums, Standard Falls | 5 Comments »
I found this model in a box in my mancave last week. I had almost completely forgotten about it, even though the nondescript box that it lives in has been staring me in the face for seventeen years,
Obviously its a fantasy building of indeterminate sort. Its quite large as these things go, so its probably an inn or coaching house.
I put it together from scratch in 1995 as a project for a course that I was doing. The scale is a little off for 28/30mm figs, but its close enough.
The privvy is cute. I am absolutely astonished that it has survived intact for so long. Its 100% balsa construction makes it a bit like a city built on rock and roll: structurally unsound.
The piece isnt undamaged though. Note that the circular window at the top of the photo above has fallen in to the structure. The paint on the tiles is coming off in places in a disconcerting fashion too, as can be seen below along with the missing second chimney pot. But all in all its in pretty good nick.
The chimney is made from air hardening clay applied in an effort to look like stone work. The “stones” are a bit soft looking, but intact.
I am planning to fix some of the damaged areas and to add some light weathering. I also plan to add a few posters to the walls plus a sign declaring the building a coach house or inn for use in Malifaux games.
I havent fully decided on a name for the establishment yet. Considering the goofy steampunkhorrorvictorianwestern nature of Malifaux I am seriously considering naming it The Cowboy and Necrophiliac. Thats what I have been calling Malifaux at home recently anyway (as in “Im off to play cowboys and necrophiliacs honey. Dont wait up” or “I cant wait to get finished with this sexy nurse so that I can play cowboys and necrophiliacs with her on Tuesday when the lads come over”).
Admittedly The Cowboy and Necrophiliac is a bit of a mouthful, but it should make for funny signage. Anyone have any better name ideas?
Filed under: Terrain, Workbench | Tagged: 1995, Fantasy, Malifaux, Western | 4 Comments »