


“Hammerhead” and “Sawtooth”, ready to donut in protest at guzzoline shortages.
Post apocalyptification of toy cars is simple, fast and joyous.
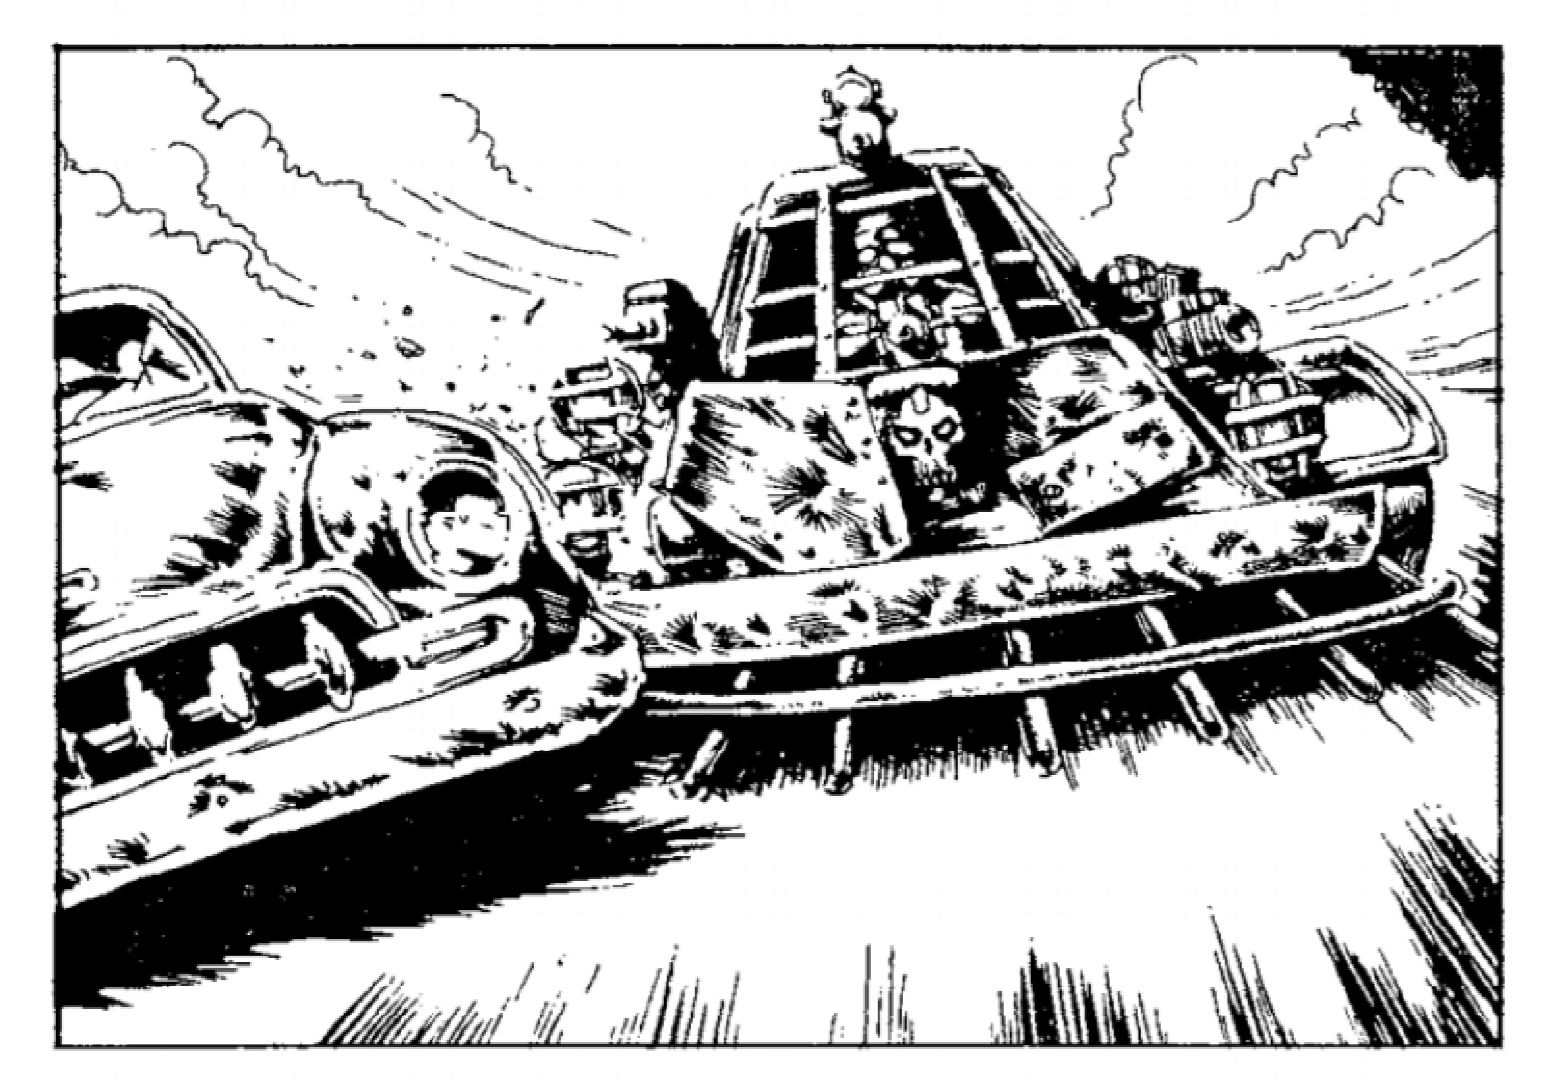
Carl Critchlow “Dark Future” art blew my tiny teenage mind.
I first tried repainting and modifying Matchbox and Hot Wheels cars in 1990 or so. I was terrible at it, trying out spray cans, masking and all sorts of other techniques for the first time and making a hames of it. I got better at painting etc since, but never got the enthusiasm up to go back to working on toy cars again until last week.

When Gaslands was first released in November 2017, I was tempted to get involved, but resisted that temptation because of other projects on at the time. Gaslands turned out to be extremely popular, so popular that a second edition, compiling all sorts of extra material was released recently. This time I couldn’t resist getting stuck in.

For various reasons, my painting time and resources are currently divided up in a counter productive way, and it is having a negative effect on my output and motivation. Therefore it was important that any Gaslands work is high turnover, and results in easy wins. This is how I approached the process on these two test cars:
- Don’t bother taking the car apart unless you are planning major reconstruction or interior work.
- If you take the car apart for some reason and you want to retain the windows, paint the interior of the glass with a dark colour now.
- Don’t bother spraying the bodywork (unless you really must get rid of the existing factory paint job for some reason), just weather over the top. Using the existing factory scheme helps to add faux history to the paint job, plus it speeds up the entire process significantly.
- Glue the wheels in place. It’s slightly demoralising, but it needs to be done for gaming. Occasionally you may need to dismantle the vehicle to get at the wheels, but usually running some superglue into the axles will do the trick.
- Glue on all of the extra parts: armour, guns etc.
- Paint some random panels black. These will represent replacement elements.
- Stipple the black panels in colours distinct from the car bodywork. Don’t stipple out as far as the edge of the panel: leave black at the edges, which will help with the dinged up look later.
- Paint appropriate elements in a gunmetal.
- Wash everything with Nuln Oil/Army Painter Dark tone. The factory paint job may cause the wash to bead a bit.
- Wash everything with Agrax Earthshade/Army Painter Strong tone. This wash will adhere better as it goes on over the previous coat.
- Stipple or sponge a dark chocolate brown (I used Rhinox Hide) onto lower 1/3 of vehicle.
- Drybrush or sponge much of the vehicle a steel colour (I used Necron Compound), how much is up to you. Apply heavily on bare metal areas and on the repainted panels. Go lighter on factory painted bodywork.
- Drybrush or sponge the entire vehicle with a pale, dusty brown or grey (I used Sylvaneth Bark, focusing more heavily on the bottom half of the vehicle.. I think that I didn’t go heavily enough on this stage on these two cars. I will try to go a bit further on the next ones).
- Lightly drybrush select areas with steel colour again, wherever looks like it will benefit from that.
- I added spots of a shiny chrome to extreme parts of the metal areas. Not strictly necessary, but I like doing it. I sometimes add scratch marks in the direction of movement at this point too, depending on the finish that I want.
- I painted the windows on these cars black. On some cars I will go for a more glassy, probably navy blue fade finish, but I was trying to suggest that there are no windows in the cars above.
- I spotted fluorescent paint on some of the lights, just to brighten the overall paint job up a bit.
- Nuln Oil gloss was applied to parts that need to look like they have well maintained parts (some engine elements, some weapon elements etc).

Two toy cars enter, two post-apocalyptic rides leave.
The sprue shown above is a the “Implements of Carnage” from Northstar. Recommended.

Bits of styrene sheet, styrene I-beam, a GW bird skull and a couple of “Implements of Carnage” create the “Hammerhead”.

Old Citadel chainblades, a turret from a titan, some pouches from an unknown source and some more styrene sheets and strips create the “Sawtooth”.

Vroom-vroom, Ratatattatat…
Inevitably, there are a few things that I would do slightly differently if I started with those two again (the gun on the roof of the “Hammerhead” would look nicer if it was mounted on a metal plate, rather than directly to the roof for example) but it was all very simple work, rapid and straightforward, plus I like the finished result.
It gave me an appetite to work on some more.


Filed under: Miniatures, Workbench | Tagged: 2019, 20mm, Crazy Horses, Death Race, Gaslands, Mad Max, North Star Military Figures, Post Apocalyptic, Sci-fi, Wasteland |

Gorgeous mate – these are superb! I have fond memories of converting an old Matchbox Corvette back in the late 80’s – man I wish I still had that car… This post makes me want to revisit the whole genre!
LikeLiked by 3 people
I tried to make a Porche 911 into a cop car back then, and a Transit into a cultist transport. I’m not particularly into cars, but there is appeal to prepping a version of a car that I have liked for years.
The great/problematic thing about modding toy cars is how inexpensive and ubiquitous they are, so it’s straightforward to get started… like opiates.
Thanks for the feedback Akex!
LikeLiked by 2 people
Great cars … I admit this plastic prue is very helpful. Lot of fun with this game, Gasland is a very good game. Cheer!
LikeLiked by 2 people
Thanks Nico!
I’m aiming for a rapid output, but I think that I can get them out at a good enough level for gaming with pretty fast. Trying to work smarter, not harder 🙂
LikeLiked by 1 person
Looking pretty sweet. The little plastic bitz really help to change the profile of the vehicles.
When my son gives up on toy cars (any day now), I am definitely going to select a few to retain for future dismemberment.
LikeLiked by 2 people
I find the process rapid from start to finish, and enjoyable all the way through, scratch making some parts and modifying others. It’s a very pleasant way to spend a few hours.
Even if your son decides that he is a lifelong toy car fan, you can pick up a car for €2 in pretty much any supermarket… go on, treat yourself 🙂
LikeLike
The Hammerhead is fantastic! The dozer blade on the front is a nice touch, gives it some additional heft. And you are right, the grimy gold stock paint turned out looking good. I vaguely recall doing a bit of this kind of modeling when I was younger but nobody I knew played Car Wars etc. so no motivation…
LikeLiked by 2 people
The lowrider look of the Hammerhead made it appealing before I went near it with paint and glue, and I like it more since.
The paint job on these cars is not as tight as I usually aim for, but really, I’m happy with the grime-over-factory-paint and the speed it allows me to get these from start to finish in a way that gives me motivation.
I had a version of Car Wars (unplayed) and a set of Dark Future (played with a disinterested brother maybe twice) back then, so I understand the lack of impetus.
I’m playing my first game of Gaslands next week with a bit of luck. Should be a giggle 🙂
LikeLike
Great explanation of your technique. I’m hoping to be able to bang a few cars out.
LikeLiked by 2 people
Thanks Sean, I hope that the approach described helps.
Those Devil’s Run cars that you have lined up generate envy in me, you will be able to rattle those out I suspect.
LikeLike
I enjoy playing GASLANDS so this was fun to see. Appreciate the tutorial. Have the original rules set and templates (not sure how much changes in version 2?). Someday I might just start doing cars…but sooo many projects already…tempting!
LikeLiked by 1 person
I *think* that the core rules are close to unchanged from 1st to 2nd edition Mark. Minor tweaks to the core rules, some tweaks to build costs here and there, plus a lot of extra bits and pieces.
This project is a good fit for my schedule and resources right now, so it’s getting some love. My other projects are not going anywhere while I enjoy this.
I have yet to play the game, so it’s good to see another positive vote for it 🙂
LikeLiked by 1 person
Thanks and good luck with the project. Looking forward to seeing what you come up with for it. I have a few GASLANDS posts on my blog that you might find interesting.
LikeLiked by 1 person
They certainly look the part 🙂
LikeLiked by 1 person
That’s the most important bit to get right, thanks Frank!
LikeLike
Gaslands is ace. Welcome aboard.
LikeLiked by 1 person
and the tips are spot on. Weathering factory paint jobs can deliver good results. I like the idea of replacement panels. I’ll be doing that one for sure.
LikeLiked by 1 person
I’m still experimenting with different approaches, but modifying the existing paint scheme makes sense to me, saving time and adding depth.
I plan to recolour some vehicles that I have specific plans for, but as a rule of thumb I’m leaving the factory scheme and working over it.
I have been reserved on the colours of the “replacement panels” so far, but I will be a bit more obvious on some future jalopies.
Thanks for the feedback!
LikeLiked by 1 person
Thanks dave2718!
LikeLike
Even though I’m not a fan of the game, I can appreciate the conversion work, especially on the hammerhead….that one looks great. The PJ on that one is really nice.
Might I suggest weathering up the tyres a bit on the buggy a little though Paul? They look a bit clean for the wastes 😉
Cheers 🙂
LikeLiked by 1 person
I’m glad that you like them Mr P!
The tyres on both were weathered alongside the rest of the vehicles actually, and I went back and painted most of the contact area black again. The mud/dust all over the wheels homogenised the look a bit in a way that I didn’t like, so I went for a dirty-car-that-has-just-driven-on-blacktop-for-an-hour look instead. I’ll take the feedback on board though 🙂
LikeLike
I’m fascinated that you glue the wheels in place. I’d have thought the joy comes from keeping these as toy cars and being able to run them around Hot Wheels stunt tracks and loop-de-loops.
Thanks for sharing your method!
LikeLiked by 1 person
It amuses me how different subsets of the broad hobby have odd little aspects where there is not concensus: basing (and the elements in it’s orbit) is one of the more common areas of friction. The glued wheels in toy car gaming is a strongly linked issue I think.
Gluing the wheels feels a bit off, like gluing Lego.
In an ideal world I would have a brake mechanism on each car, to lock the wheels in place as appropriate, but in this world, that’s not practical.
I gave some thought to basing the cars, for many of the same reasons that I based my Man O War ships, and also because any motorcycle models that I use will have to be based anyway. In the end, as the cars are not soft, easily chipped metal, sliding around on tabletops, I decided to leave them baseless.
The bases in Man O War help to align various templates against pretty organic shapes. Similar template placing mechanics are used in Gaslands, which would, undeniably, benefit from the cars being based, but I didn’t base them.
However, I would be very unimpressed if a Man O War ship rolled around the table when bumped against by a placed template. And so, with a heavy heart, I applied the same logic, and glued my toy car wheels.
I was delighted when I could carry four painted cars upstairs on the Gaslands rulebook without drama though. Swings and traffic circles.
I hope that ramble answers your question Curis 🙂
LikeLike
Glad to see you getting into the game. It’s a fun one.
I have a paint process that I like, but give yours a try: love your results!
LikeLiked by 1 person
*but WILL give yours a try
LikeLiked by 1 person
First Gaslands game tomorrow: I am excite 🤩
I’m delighted that you like the results that I have been getting Gabbi. Expediency is extra important for me currently, so this rough and ready approach suits for a few reasons.
I do want to try some fully painted schemes later, but for now this is giving me what I want.
LikeLiked by 1 person
In my Dark Future days I did something very similar, but had to spray a matte sealant on the cars first. The factory paint was too slick for my citadel paint to adhere too well. Did you not find that the case? I’m getting back into car modeling with Gaslands so was glad to find this post. I imagine I’ll do something similar having just ordered the weapon sprue. I think I’ll add all the bits then hit the car with a sealant.
LikeLiked by 1 person
The factory paint is a little hydrophobic, but not so much that modern washes won’t adhere to it. It will be a bit blotchy, but in this context that doesn’t bother me at all.
The second wash goes on more easily, with the dried first wash to adhere to. The same applies to the stippled on, undiluted brown paint.
It’s straightforward, if you fancy giving it a go.
A matt coat beforehand would certainly make the washes apply differently, in a more even fashion. If that’s what you want, then go for it 🙂
Expediency is key for me here, and one less spraying step is time saved to use on another vehicle, but of course, your mileage may vary.
I’m glad that the post has helped either way Mr. White!
LikeLike
[…] wasn’t built and is not maintained there, so I weathered it a little less than the other Gaslands cars that I have prepped to date, which tend to look as though they are upcycled […]
LikeLike
[…] it took was a shiny new hardback edition and this blog post from Sho3box. To be honest, I loved playing Dark Future, but didn’t care much for painting […]
LikeLike
I posted my results of this method on my blog and credited your page here. I hope you don’t mind. Fantastic. Thank you! https://wyrdstonesandtacklezones.com/2019/12/04/gaslands-back-into-the-wasteland/
LikeLiked by 1 person
I’m delighted to see this Mr White, thank you for reporting back. You got fantastic results.
I hope that you enjoy returning to the tabletop wasteland again. I think that you will enjoy playing Gaslands more than Dark Future, fun, formative years aside 🙂
LikeLike
Hey there, I tried to email you, but the email kicked back to me that it didn’t work. I had a question about the styrene you used. I’m trying to work on a build at the moment and thought I would try it out (0.040″ thickness) and its not very flexible. I noticed some of your pieces are rather bent. Did you apply heat to get them to flex like that? Or use a thinner styrene?
I also wanted to thank you for your painting process as it helped me finish my very first gaslands car.
I call it the Love Tap.
https://twitter.com/CaveMonsterArt/status/1363714332341784576
LikeLike
Sorry about the comms difficulties BigCaveMonster, this comment went into spam because of the links and tags.
I have used styrene in all sorts of thicknesses for the Gaslands cars, varying from about 2mm thick to some that is like thin paper. Off the top of my head I couldn’t tell you what thicknesses the sheets that I used are (I have literally been using tiny bits of that same big sheets since 1996…). I can tell you that I didn’t get into heating the styrene for attaching it to the cars. I find heating small pieces of plastic like that quite tricky, and as I was trying to get these done and ready for the table as fast as I could I ruled that out as an option very fast. Any curved shapes on my Gaslands vehicles were achieved with brute force and thin sheets of styrene I expect. I would bet all the guzzoline in the Wasteland that there are several good YouTube videos on heating and shaping styrene though.
The “Love Tap” looks fantastic. I’m delighted that this blog post helped you get the first car on the table. Thanks for letting me know!
LikeLike
Love this tutorial so much, I got some really cheap off-brand cars with screws instead of rivets, so I did bother to take off the body for stripping and repainting, but otherwise followed your steps and the results are really great.
Do you varnish after you’re finished, and if so what do you use? I’ve never been brave enough to varnish my miniatures but with these cars I feel happier to take the “risk”
LikeLiked by 1 person
I’m delighted to hear that it worked out that well for you Matt, thanks fir sharing!
It is too humid to trust spray varnishing where I live, so I brush on Windsor & Newton Galleria artists varnish. It matts down the gloss elements well enough. I don’t know how well it protects, but I don’t have very many chipped figures, do that’s a good sign I guess 🙂
LikeLike
Thank you for your reply and answer man. One question I forgot to ask, do you bother to prime the added plasticard and weapons by hand, or just go straight to painting on bare plastic?
LikeLiked by 1 person
You are welcome Matt 🙂
I paint straight over the plasticard and other bits and pieces. Sometimes they need a second coat, depending on the colour, but with the finish I am going for, plus the washes, even that often isn’t really necessary.
LikeLike